A broken vacuum hose can feel like the end of the world for your cleaning routine. However, replacing it yourself is easier than you might think. You do not need to hire a professional or buy a brand-new vacuum. With the right tools and a little patience, you can fix the problem at home and save money at the same time.
This guide will walk you through every step of the process. Additionally, it will help you understand what to look for before you start, so you can complete the job with confidence.
Why Vacuum Hoses Break Down
Vacuum hoses take a lot of abuse. They twist, bend, and stretch every time you clean. Over time, this constant movement causes wear and tear. Therefore, cracks, holes, and blockages are very common.
There are a few main reasons why hoses fail. First, small debris like glass or sharp pebbles can pierce the inner lining. Second, pets and children sometimes chew on the hose. Third, heat from the motor can cause older plastic hoses to crack. Finally, a clog that goes untreated can build up pressure and split the hose open.
Understanding the cause helps you choose the best replacement and prevent the problem from happening again.
Signs That Your Vacuum Hose Needs Replacing
Before you buy a new hose, you need to confirm that the hose is actually the problem. Sometimes the issue lies elsewhere, such as a full dustbin or a clogged filter. However, if you notice any of the following signs, the hose is likely to blame.
- Your vacuum has noticeably less suction than usual.
- You can hear a hissing or whistling sound while the machine runs.
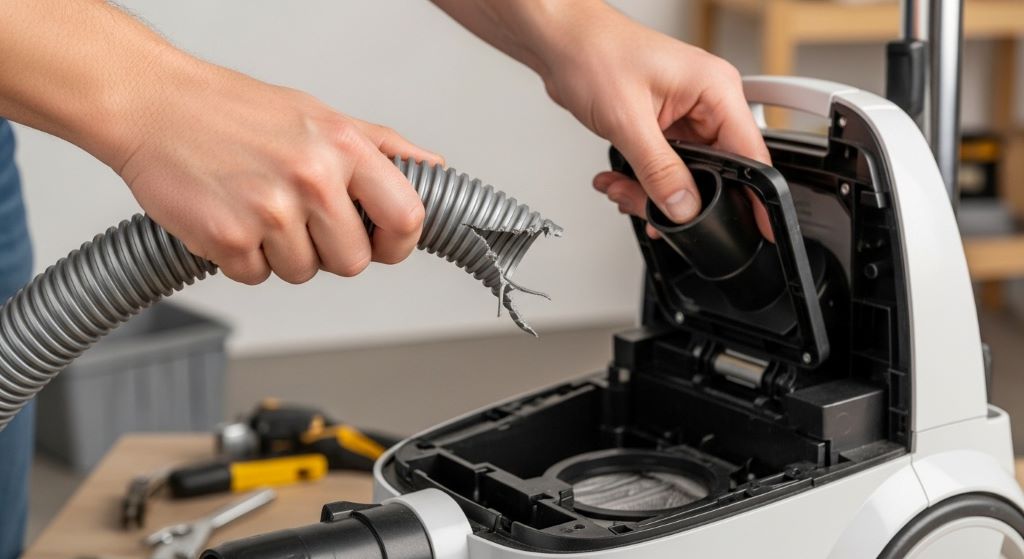
- You can see visible cracks, holes, or crushed sections on the hose.
- Dust or debris blows back into the room instead of being collected.
- The hose feels stiff, brittle, or has separated at the connectors.
If you spot any of these issues, it is time to move forward with a replacement.
What You Will Need Before You Begin
Gathering your tools ahead of time makes the whole process smoother. Fortunately, you will not need anything too specialized. Most of these items are already at home or available at any hardware store.
- A replacement vacuum hose that matches your model
- A flathead screwdriver
- A Phillips screwdriver
- Needle-nose pliers
- A soft cloth or paper towels
- Your vacuum’s user manual (if available)
When it comes to finding the right replacement hose, start by checking your vacuum’s model number. This is usually printed on a sticker located on the bottom of the machine. Once you have the model number, you can search for the correct hose online or at a local appliance store.
How to Find the Right Replacement Hose
Not all vacuum hoses are the same. They differ in length, diameter, and connector type. Therefore, using the wrong hose can cause poor suction or a poor fit at the connection points.
The safest option is to search for an OEM (original equipment manufacturer) hose. This is the part made by the same company that built your vacuum. However, many third-party hoses also work very well and cost less. Just make sure the listing clearly states that the hose is compatible with your specific vacuum model.
You can find replacement hoses at vacuum repair shops, appliance retailers, and major online marketplaces. Additionally, some manufacturers sell parts directly through their website.
Step-by-Step Guide to Replacing the Hose
Now comes the most important part. Follow these steps carefully and you will have your vacuum working again in no time.
Step 1: Turn Off and Unplug the Vacuum
Safety always comes first. Before you touch any part of the machine, make sure it is completely switched off. Then unplug it from the wall. This simple step protects you from accidental shocks or the machine turning on unexpectedly.
Step 2: Remove the Old Hose
Locate both ends of the hose. One end connects to the vacuum body, and the other end connects to the handle or cleaning attachment. Most hoses twist and lock into place. To remove them, twist the connector counterclockwise and pull gently.
Some models use clips or screws to hold the hose in place. In that case, use your screwdriver or pliers to release those fittings. Be careful not to force anything. If it feels stuck, check your user manual for specific instructions.
Step 3: Clean the Connection Points
Once the old hose is off, take a moment to clean the ports where it was attached. Dust and debris often build up in these areas. Use a soft cloth or a dry paper towel to wipe everything clean. This step ensures a tight, secure fit for the new hose.
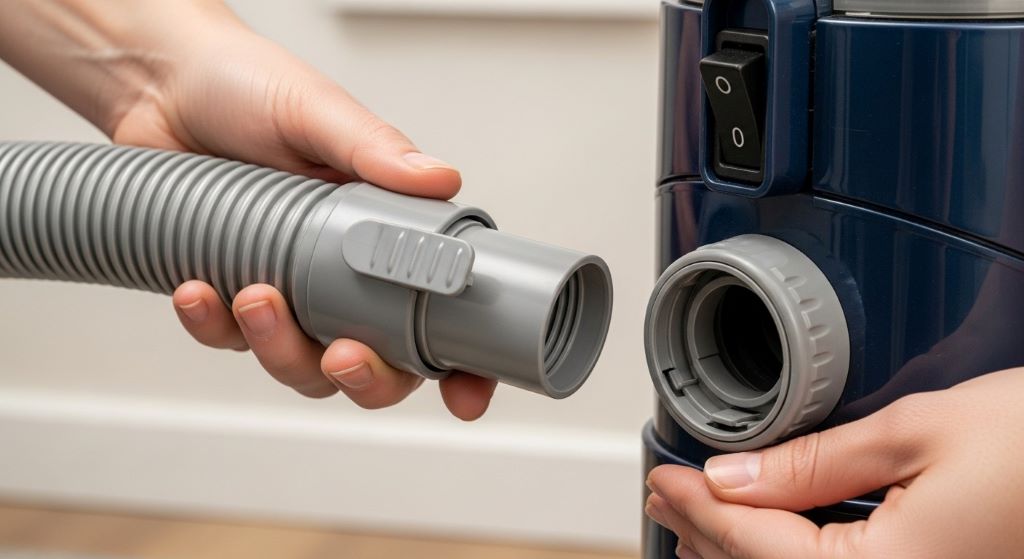
Step 4: Attach the New Hose
Take your new hose and line it up with the connection ports. Insert one end into the vacuum body first. Push it in firmly and twist it clockwise until you hear or feel it lock into place. Then connect the other end to the handle or wand attachment.
If the hose uses clips or screws, fasten those securely now. Do not overtighten screws, as this can crack the plastic housing. A snug fit is all you need.
Step 5: Test the Vacuum
Plug the vacuum back in and turn it on. Listen carefully for any unusual sounds. Additionally, hold your hand near the hose to feel for any air leaks. If the suction feels strong and there are no strange noises, you have successfully replaced the hose.
However, if you still notice weak suction or hear a hissing sound, double-check that both ends of the hose are fully locked in. Sometimes a slight misalignment is all it takes to cause a leak.
Tips to Make Your New Hose Last Longer
Replacing the hose is a great fix. However, taking care of the new hose properly will help it last for years. Here are some simple habits that make a big difference.
- Avoid bending the hose at sharp angles when cleaning. Tight bends weaken the material over time.
- Do not drag the vacuum by the hose. Always carry the machine or pull it by the handle instead.
- Store the hose loosely coiled, not tightly wound around the vacuum body.
- Check the hose every few months for small cracks or signs of wear.
- Clear blockages promptly instead of pushing the vacuum harder.
These habits are easy to build. Therefore, they are well worth the small effort they require.
When to Consider Buying a New Vacuum Instead
Replacing a hose is a smart move when the rest of your vacuum is in good condition. However, there are times when a repair is not worth the cost. If your vacuum is very old and multiple parts are failing at once, a new machine might make more sense financially.
Additionally, if the cost of the replacement hose is close to the cost of a budget vacuum model, it is worth comparing your options. That said, for most mid-range and high-end vacuums, replacing the hose is almost always the better value.
Conclusion
Replacing a vacuum cleaner hose on your own is a simple, rewarding task. You do not need to spend money on a technician or rush out to buy a new machine. All you need is the right replacement part, a couple of basic tools, and the steps outlined in this guide.
To summarize, start by identifying the signs of a damaged hose. Next, find the correct replacement using your vacuum’s model number. Then follow the five steps to remove the old hose, clean the connection points, and attach the new one. Finally, test your vacuum to confirm everything is working properly.
With a little care and the right approach, your vacuum will be running like new again. Additionally, by following the maintenance tips in this guide, you can extend the life of your new hose for a long time to come.
Frequently Asked Questions
1. How do I know which replacement hose fits my vacuum?
Check the model number on the sticker at the bottom of your vacuum. Use that number to search for a compatible hose online or ask at an appliance store. Always confirm the hose is listed as compatible with your exact model before purchasing.
2. Can I use tape to fix a small hole in the hose instead of replacing it?
You can use heavy-duty tape as a temporary fix for very small holes. However, this is not a long-term solution. The tape may come loose over time, and the repair will not restore full suction. Therefore, replacing the hose is always the better option for lasting results.
3. How long does it take to replace a vacuum hose?
For most vacuums, the process takes between 10 and 30 minutes. If your model uses screws or clips instead of twist-lock connectors, it may take a little longer. However, with the right tools and this guide in hand, the job is very manageable.
4. Are universal vacuum hoses a good option?
Universal hoses can work in some cases, but they are not ideal for every vacuum. They may not fit the connection ports perfectly, which can lead to air leaks and reduced suction. Additionally, they might not match the length or flexibility of the original hose. A model-specific hose is always the safest choice.
5. What should I do if the new hose still leaks after installation?
First, check that both connector ends are fully twisted and locked into place. If one end feels loose, try removing and reattaching it. Also, inspect the hose itself for any manufacturing defects. If the problem continues, the replacement hose may be faulty, and you should contact the seller for an exchange.
Related Topics:
Why Is My Vacuum Making Noise? Fix It in Minutes