
A canister vacuum cleaner is one of the most versatile cleaning tools you can own. It handles carpets, hard floors, stairs, and even curtains with ease. However, like any appliance, it needs regular care to keep working well. Without proper maintenance, even the best vacuum can lose suction, develop bad odors, or break down early.
This guide walks you through every step you need to maintain your canister vacuum. By following these tips, you can extend its life and keep your home cleaner for years to come.
Why Regular Maintenance Matters
Many people only think about vacuum maintenance when something goes wrong. That is often too late. Regular upkeep prevents small problems from becoming big repairs. Additionally, a well-maintained vacuum uses less energy and cleans more effectively.
Dust and debris build up fast inside a vacuum. Over time, this buildup blocks airflow and strains the motor. Therefore, simple cleaning tasks done often can add years to your machine’s life.
Empty the Dust Container or Replace the Bag Regularly
The first step in canister vacuum maintenance is managing the dust collection area. Whether your vacuum uses a bag or a bagless canister, this part needs frequent attention.
For Bagged Models
Replace the bag when it reaches about two-thirds full. A full bag reduces suction power fast. Moreover, a packed bag forces the motor to work harder, which shortens its lifespan. Always use the correct bag type for your model. Off-brand bags may not seal properly, allowing dust to escape back into the air.
For Bagless Models
Empty the dust canister after every use, or whenever it reaches the maximum fill line. Rinse the canister with warm water every few weeks. Let it dry completely before putting it back. Putting a damp canister back into the vacuum can cause mold and unpleasant smells.
Clean or Replace the Filters
Filters are one of the most important parts of any vacuum cleaner. They trap tiny particles that would otherwise blow back into your home. However, filters get clogged over time. A clogged filter means weak suction and poor air quality.
Most canister vacuums have more than one filter. Check your manual to find out where each filter is located.
Washable Filters
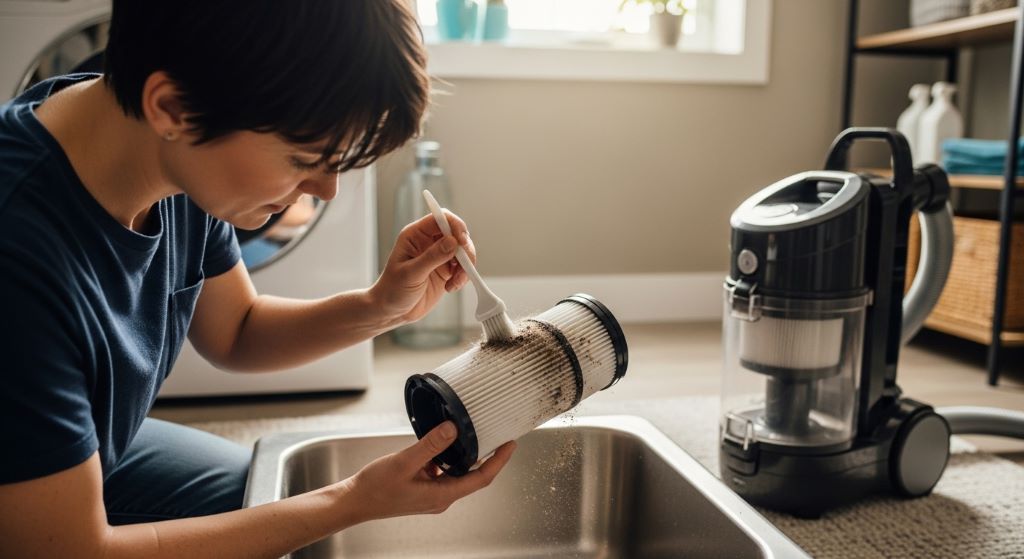
Tap the filter gently over a trash can to knock out loose dust. Then rinse it under cool water. Do not use soap unless the manual says it is safe. Allow the filter to air dry for at least 24 hours. Never put a wet filter back into your vacuum. This is a common mistake that can damage the motor immediately.
Non-Washable Filters
Some filters cannot be washed. These must be tapped clean and replaced regularly. Most manufacturers recommend replacing non-washable filters every three to six months. If you have pets or allergies, consider replacing them even more often. Additionally, HEPA filters in particular should be replaced on schedule to maintain air quality.
Inspect and Clean the Hose and Attachments
The hose is the lifeline of a canister vacuum. It carries all the dirt and debris from the floor to the container. Therefore, blockages in the hose are a common cause of poor performance.
Checking for Blockages
Detach the hose from the vacuum. Hold one end up to the light and look through it. If you cannot see light at the other end, there is a blockage. Use a long, flexible brush or a broom handle to gently push the clog out. Never use sharp objects, as these can puncture the hose.
Washing Hoses and Attachments
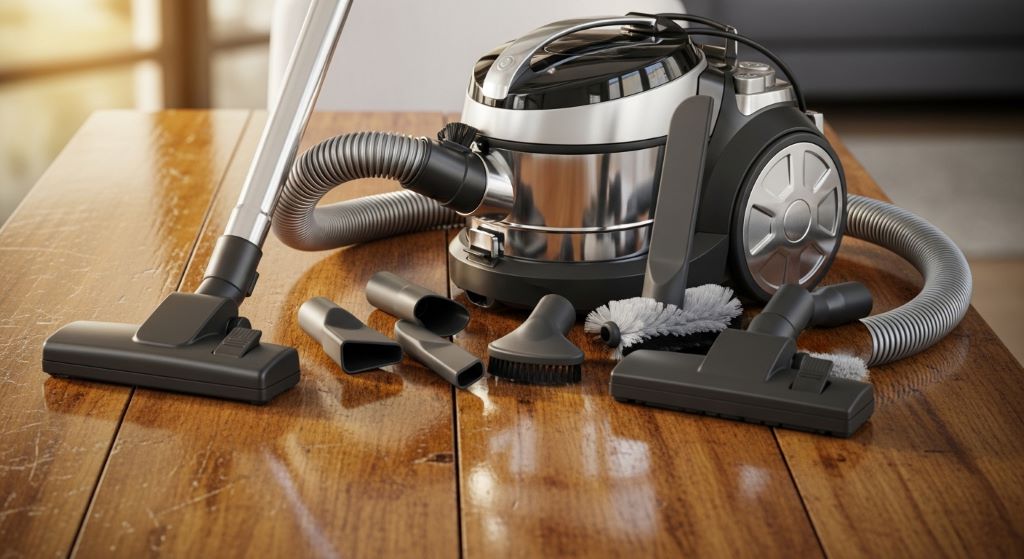
Once a month, rinse the hose with warm water to remove built-up dust and grime. Let it dry fully before reattaching. Clean the brush roll, crevice tool, and other attachments in the same way. Dirty attachments spread dirt instead of picking it up. Additionally, check the hose for cracks or tears. A small crack can leak air and reduce suction significantly.
Maintain the Brush Roll and Floor Head
The brush roll spins to agitate carpet fibers and loosen embedded dirt. Over time, hair, threads, and fibers wrap around it. This slows the roll down and reduces cleaning power.
Remove the floor head and turn it over. Use a pair of scissors or a seam ripper to cut away tangled hair and threads from the brush roll. Be careful not to cut the bristles. Once the roll is clear, spin it by hand to check that it turns freely. If it feels stiff, clean the end caps where it connects to the housing.
Furthermore, inspect the bristles on the brush roll. If they look worn flat or bent outward, it is time to replace the brush roll altogether. Worn bristles cannot clean carpets properly, no matter how well the rest of the vacuum works.
Check the Motor Area and Exhaust Vents
The motor is the heart of your canister vacuum. It powers everything else. Keeping the area around the motor clean is essential for long-term performance.
First, never vacuum up large debris, water, or fine powders like ash or drywall dust unless your vacuum is designed for it. These can clog or burn out the motor quickly.
Second, keep the exhaust vents clear. The vents allow hot air to escape from the motor. If they are blocked, the motor overheats. Use a dry cloth to wipe the vents regularly. Additionally, if your vacuum shuts off suddenly during use, it may have overheated. In that case, turn it off and let it cool for at least 30 minutes before using it again.
Inspect the Power Cord and Electrical Connections
Safety is just as important as performance. The power cord on a canister vacuum takes a lot of wear. It bends, stretches, and gets pulled across floors constantly. Over time, the outer coating can crack or fray.
Check the cord before each use. Look for any cuts, kinks, or exposed wires. If you notice damage, stop using the vacuum immediately. A damaged cord is a serious electrical hazard. Contact a repair technician or the manufacturer for a replacement.
Also, avoid yanking the cord to unplug the vacuum. Always pull from the plug head. This small habit prevents most cord damage from happening in the first place.
Store Your Canister Vacuum Properly
How you store your vacuum matters more than most people realize. Poor storage leads to hose kinks, cracked plastic, and dust contamination.
Store the vacuum in a cool, dry place. Avoid areas with extreme heat or humidity, such as garages or outdoor sheds. Keep the hose loosely coiled and never bend it sharply. Sharp bends cause cracks over time.
Additionally, store all attachments together, either in a dedicated bag or in the clips on the canister body. Lost attachments mean buying replacements, which adds up quickly over the years.
Follow a Simple Maintenance Schedule
Having a routine makes maintenance easy to remember. Here is a simple schedule to follow:
- After every use: Empty the dust canister or check the bag level.
- Weekly: Check the hose for blockages and wipe down the exterior.
- Monthly: Clean filters, wash hose and attachments, and clear the brush roll.
- Every three to six months: Replace non-washable filters, inspect the cord, and check the brush roll bristles.
- Annually: Have the motor and internal components checked by a professional technician.
Sticking to this schedule takes very little time. However, it makes a huge difference in how long your vacuum lasts and how well it performs.
When to Seek Professional Help
Some problems go beyond basic maintenance. If your vacuum makes a grinding noise, emits a burning smell, or loses suction even after you have cleaned all the filters and cleared blockages, there may be an internal issue.
In these cases, take the vacuum to a certified repair center. Trying to open the motor housing yourself can void the warranty and cause further damage. Professional repairs are often much cheaper than buying a new vacuum. Therefore, do not ignore warning signs.
Conclusion
Maintaining a canister vacuum cleaner is not complicated. It simply requires consistency. By emptying the dust container often, cleaning and replacing filters, clearing the hose and brush roll, and storing the machine properly, you can keep it running like new for many years.
Additionally, following a regular maintenance schedule saves you money in the long run. A well-cared-for vacuum performs better, cleans more efficiently, and lasts far longer than one that is neglected. Therefore, invest a few minutes each month into caring for your vacuum, and it will reward you with cleaner floors and a healthier home.
Frequently Asked Questions
1. How often should I clean the filters on my canister vacuum?
You should clean washable filters at least once a month. If you vacuum frequently or have pets, clean them every two weeks. Non-washable filters should be replaced every three to six months, depending on use.
2. Why does my canister vacuum smell bad after use?
Bad smells usually come from a full dust bag or container, dirty filters, or mold caused by moisture in the canister. Empty and clean the dust container regularly, and make sure all washable parts dry completely before reassembly.
3. How do I know if my canister vacuum has a blockage?
A sudden drop in suction power is the most common sign. You may also hear the motor working harder than usual. Detach the hose and look through it to check for visible clogs. Also inspect the floor head and attachment inlets.
4. Can I wash all parts of my canister vacuum?
Not all parts are washable. Only wash components that your manual says are safe to clean with water. The motor and electrical parts should never get wet. Always check the user manual before washing any component.
5. How long should a canister vacuum cleaner last?
With proper maintenance, a good-quality canister vacuum can last eight to twelve years or even longer. Budget models may last four to six years. Regular cleaning, timely filter replacements, and careful storage are the biggest factors in extending its lifespan.
Related Topics:
How to Fix Loss of Suction in Cordless Vacuums: The Ultimate Troubleshooting Guide
How to Adjust Your Dyson Ball Vacuum for Thick Carpet Like a Pro