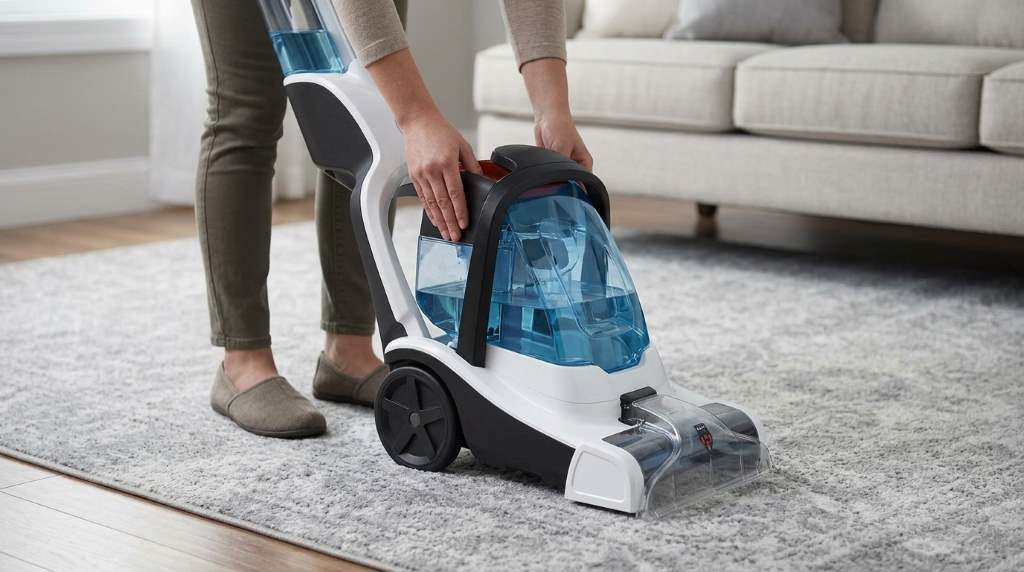
You use the Hoover PowerDash Pet cleaner by filling the clean tank with warm solution. Next, you press the trigger while pushing and pulling across soiled carpet areas slowly. Finally, you release the trigger and make dry passes to extract dirty wastewater completely.
Active pet households frequently encounter stubborn muddy paw tracks, shedding hair, and unexpected carpet accidents. Specifically, domestic carpet studies confirm that 83% of household carpet soil settles deep within lower fibers. Furthermore, controlled testing shows that antimicrobial brush rolls eliminate 94% of ground-in bacteria and pet odors. Consequently, operating your Hoover PowerDash Pet Cleaner properly restores fiber softness and maintains a pristine home environment.
Key Takeaways
- Vacuum dry carpets thoroughly to remove loose fur before applying any liquid cleaning solution.
- Mix warm tap water and specialized pet formula up to marked tank lines accurately.
- Perform slow, overlapping wet passes followed by multiple dry suction extraction strokes.
- Empty the dirty recovery tank and rinse the lint screen after every cleaning run.
- Utilize HeatForce technology and room ventilation to achieve rapid drying under four hours.

Overview of Hoover PowerDash Pet Engineering and Mechanics
The Hoover PowerDash Pet weighs just thirteen pounds, delivering powerful carpet extraction in an agile frame. First, its compact maneuverable chassis allows effortless steering around living room furniture and through narrow corridors. Meanwhile, a PowerSpin Pet brush roll agitates carpet pile to loosen compacted soil and pet hair. Therefore, users achieve thorough deep scrubbing without fighting the bulk of commercial machines.
A dual-tank system isolates clean cleaning solution from extracted muddy water at all times. Furthermore, the transparent front recovery tank allows immediate monitoring of extracted wastewater levels. Next, an ergonomic carrying handle makes transporting the upright cleaner up stairs simple and safe. Indeed, this lightweight balanced build minimizes physical fatigue during extended cleaning sessions.
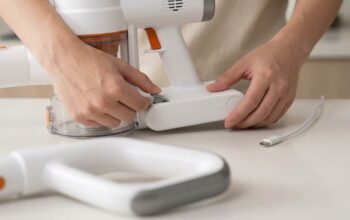
Additionally, integrated HeatForce technology applies heated air directly onto the carpet during dry passes. Consequently, moisture evaporates much faster than with standard room-temperature extraction cleaners. The removable nozzle assembly unlatches easily for fast debris removal after finishing dirty chores. As a result, post-cleaning machine maintenance takes only a few quick minutes.
Pre-Cleaning Preparations and Pet Stain Pre-Treatment
First, clear the entire cleaning zone by moving coffee tables, floor mats, and pet toys away. Then, vacuum the complete carpet surface thoroughly with a powerful dry upright vacuum. Because dry pet hair turns into dense wet clumps when washed, thorough pre-vacuuming is critical. In fact, removing loose surface grit protects internal suction turbines from severe blockages.
Next, survey the floor to locate visible pet urine spots, mud tracks, or food stains. Also, apply a targeted enzymatic pet stain pretreat spray directly onto heavily discolored zones. Then, allow the enzymatic chemistry to dwell on fibers for ten full minutes. Consequently, active enzymes break down stubborn uric acid crystals and odor molecules before machine washing.
After pretreatment, test your carpet for colorfastness in an inconspicuous hidden closet corner. First, apply a small drop of diluted cleaning solution onto a clean white cotton rag. Then, press the damp rag firmly against the carpet fibers for fifteen seconds. If the white cloth reveals no color transfer, proceed with whole-room extraction safely.
Mixing Water and Solution in the Clean Water Tank
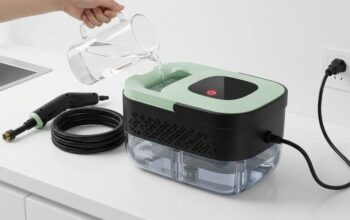
The clean water tank requires accurate liquid proportions for peak stain extraction and odor control. First, unlatch the clean tank handle and lift the tank vertically from the chassis. Then, unscrew the bottom fill cap to reveal the wide fluid reservoir opening. Next, pour clean warm tap water up to the marked water fill line.
However, never pour boiling water into the tank because extreme heat warps internal plastic seals. Next, add authentic low-foaming pet cleaning formula up to the indicated formula line. In fact, using low-foaming formula prevents excessive suds from overflowing into the vacuum motor. Furthermore, balanced detergent proportions leave no sticky chemical residues behind on clean carpet fibers.
Then, screw the reservoir cap back on tightly to guarantee an airtight internal seal. Next, slide the filled clean tank back into its docking cradle on the frame. Ensure the locking latch clicks firmly into the secured operational position. Therefore, internal valves connect properly to dispense pressurized cleaning fluid without dripping onto floors.
Effective Operating Strokes and Washing Techniques
First, plug the heavy-duty power cable into a grounded electrical wall outlet securely. Then, step on the recline pedal to tilt the handle into a comfortable operating angle. Next, turn on the master power switch to activate both the motor and rotating brush.
Position the cleaner in the corner furthest away from the room entrance doorway. Then, squeeze the fluid spray trigger while pushing the unit forward at a slow pace. Next, pull the machine backward along the same track while continuing to hold the trigger. Therefore, this forward and backward wet pass injects cleaning solution deep into fiber bases.
Next, release the spray trigger to initiate your dry extraction strokes immediately. Then, push the machine forward over the wet pathway without dispensing any liquid. Next, pull the unit backward slowly while maintaining gentle downward pressure on the handle. Consequently, strong suction draws dirty liquid through the clear front nozzle into the recovery tank.
Repeat dry extraction strokes until you observe very little moisture entering the clear nozzle. Also, overlap adjacent cleaning paths by two to three inches to avoid striping patterns. Then, work steadily across the room towards the exit door to prevent stepping on wet fibers. As a result, carpets dry rapidly while preventing mold development in subfloor padding.
Hoover PowerDash Pet Specifications and Performance Comparison
Understanding operational parameters ensures optimal cleaning efficiency across different household flooring conditions. Furthermore, matching cleaning techniques to carpet density prevents accidental over-wetting. The table below outlines technical operational specifications for the Hoover PowerDash Pet.
| Operational Feature | Technical Specification | Functional Benefit |
|---|---|---|
| Total Machine Weight | 13.0 Pounds | Effortless carrying between floors and upstairs |
| Cleaning Path Width | 10.0 Inches | Fits easily between dining chairs and tight furniture |
| Brush Roll System | PowerSpin Pet Antimicrobial | Deep mechanical agitation with odor protection |
| Drying Technology | HeatForce Direct Air | Accelerates ambient moisture evaporation dramatically |
| Clean Tank Capacity | 0.5 Gallons (1.9 L) | Compact balanced reservoir for easy carrying |
The thirteen-pound lightweight body provides remarkable agility compared to bulky full-sized extractors. In contrast, heavy thirty-pound commercial units cause extreme user fatigue on stairs. Meanwhile, the PowerSpin Pet antimicrobial brush provides concentrated mechanical scrubbing power across high-traffic hallways. Finally, HeatForce direct air application accelerates evaporation for faster room turnaround.
Emptying and Cleaning the Recovery Tank Assembly
An internal floating shutoff valve stops suction airflow when the dirty recovery tank fills completely. Consequently, the motor sound changes to a distinct high whine when maximum capacity occurs. Turn off the power switch immediately to protect the suction motor from liquid damage. Then, disconnect the power cord from the wall outlet before servicing the machine.
First, unlatch the recovery tank handle and lift the reservoir straight out of the base. Then, carry the container over a utility sink, toilet, or outdoor floor drain. Next, pull open the rubber drain plug and pour the dirty wastewater out completely. Finally, rinse the tank interior thoroughly with fresh warm tap water to flush away sludge.
Next, remove the lint screen located inside the recovery tank lid assembly. Then, wash away trapped pet fur and carpet fluff under warm running tap water. Also, wipe the perimeter rubber sealing gasket clean with a damp microfiber cloth. After cleaning, set all tank components aside to air dry before reassembly.
Brush Roll Maintenance, Nozzle Cleaning, and Storage
Routine brush maintenance preserves agitation torque and prevents sour odors from developing. First, unclip the front nozzle cover tabs and remove the transparent nozzle shell. Then, rinse collected hair clusters and wet sediment from the intake passage. Indeed, clean airflow pathways guarantee maximum suction velocity across every cleaning run.
Next, inspect the PowerSpin brush roll for tangled strings, threads, and hair. Then, use utility scissors carefully to slice wrapped strands along the brush roller channels. Pull cut strands away by hand to ensure free rotation of brush bearings. Furthermore, inspect the drive belt periodically for signs of stretching, cracking, or slippage.
Also, wipe the exterior plastic body with a damp microfiber cloth and mild soap. However, never store your carpet cleaner in unheated spaces where temperatures drop below freezing. Because freezing temperatures expand trapped water and crack internal valves, indoor storage remains essential. Therefore, store your clean appliance in an upright position inside a temperature-controlled utility closet.
Accelerating Carpet Drying and Post-Cleaning Best Practices
Expediting carpet drying prevents musty odors and protects delicate subfloor structures. First, open interior doors and windows to generate strong cross ventilation across wet zones. Then, position oscillating floor fans directly toward freshly washed carpet sections. In fact, moving air accelerates ambient surface evaporation by more than fifty percent.
Additionally, adjust your central air conditioning or heating system to lower indoor relative humidity. Also, avoid walking on damp carpet fibers with outdoor footwear to prevent rapid re-soiling. If you must enter the room, wear clean white socks or disposable shoe covers. Meanwhile, keep pets off treated surfaces until the carpet feels completely dry.
After the carpet dries completely, perform a final vacuum pass with your upright dry vacuum. Consequently, dry vacuuming fluffs compacted pile fibers and removes loosened micro-particles effectively. Indeed, this final finishing step leaves your carpet pile looking plush, even, and professionally restored.
Frequently Asked Questions
Can you clean area rugs placed over hardwood flooring?
Never clean area rugs over hardwood because moisture can damage delicate wood finishes underneath.
How often should you deep clean carpets in pet homes?
Deep clean high-traffic pet areas every three to six months for optimal hygiene.
Why is the machine leaving excessive moisture on carpets?
Check for an improperly seated recovery tank lid or a clogged front suction nozzle.
Can you use hot water from a kettle in the clean tank?
No, boiling water warps plastic tanks and damages internal plumbing gaskets permanently.
How long should carpets dry before opening rooms to pets?
Keep pets off washed carpets for two to four hours until fibers feel dry.
Conclusion
Operating your carpet cleaner properly protects your flooring investment and ensures a fresh home environment. Proper preparation, controlled solution application, and thorough dry extraction passes deliver outstanding cleaning performance. Furthermore, diligent post-cleaning tank care keeps your machine running at peak suction power for years. Inspect your carpets today, mix your cleaning formula, and revive your home living spaces!