Maintaining a clean home is a constant battle, especially with the relentless accumulation of dust, debris, and pet hair. Your Shark Lift-Away vacuum, a versatile and powerful cleaning companion, plays a crucial role in this fight. However, like any hardworking appliance, it requires regular maintenance to ensure optimal performance and longevity. A neglected vacuum can not only lose suction power but also become a breeding ground for allergens and unpleasant odors. This comprehensive guide will walk you through the essential steps of cleaning your Shark Lift-Away vacuum, empowering you to keep your home sparkling clean and your vacuum functioning flawlessly.
Understanding Your Shark Lift-Away: A Foundation for Effective Cleaning
Before diving into the cleaning process, it’s essential to understand the anatomy of your Shark Lift-Away. This vacuum is designed with a unique detachable canister, allowing for versatile cleaning in various modes, from upright vacuuming to portable canister cleaning. Familiarizing yourself with the different components, such as the dust cup, filters, brush roll, and hoses, will enable you to perform a thorough cleaning and address specific areas effectively.
Each model of bagless vacuum cleaners may have slight variations, so always refer to your user manual for detailed diagrams and instructions specific to your vacuum. The ability to switch between modes is a key feature, and understanding how these modes interact with the cleaning process is paramount to achieving a deep clean.
The Importance of Regular Cleaning: Beyond Aesthetics
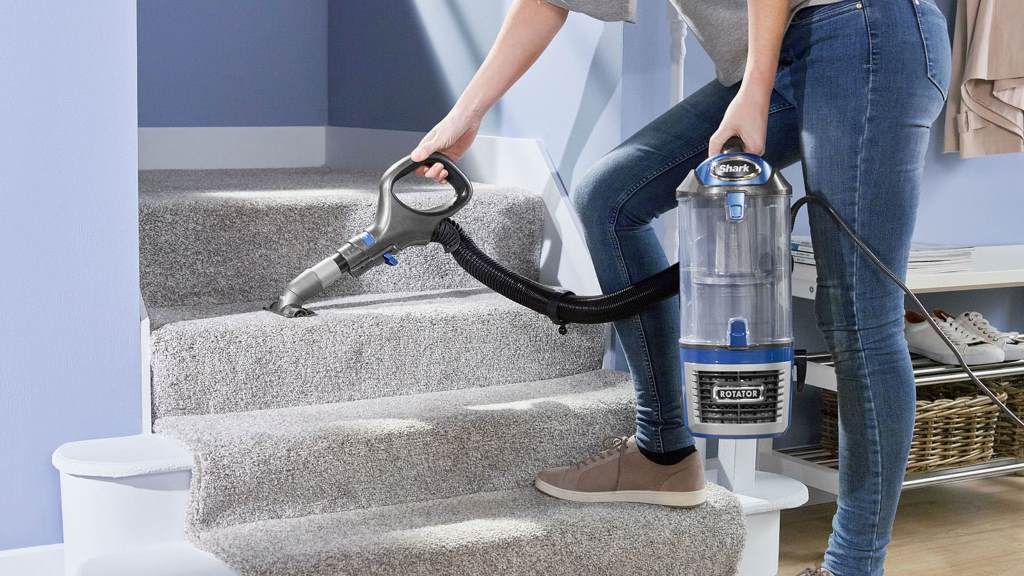
Cleaning your Shark Lift-Away isn’t just about maintaining its appearance; it’s about preserving its functionality and ensuring a healthy home environment. A clogged filter or a tangled brush roll can significantly reduce suction power, making your vacuum less effective in picking up dirt and debris. Moreover, a dirty vacuum can recirculate dust and allergens back into the air, potentially triggering allergies and respiratory issues.
Regular cleaning prevents these issues, ensuring your vacuum operates at peak performance and contributes to a healthier living space. Furthermore, the longevity of your machine will be increased. Imagine the stress on the motor if it is constantly fighting against a clogged filter. Regular maintenance reduces this stress.
Step-by-Step Guide to Cleaning Your Shark Lift-Away Vacuum
Now, let’s delve into the practical steps of cleaning your Shark Lift-Away vacuum.
1. Emptying the Dust Cup: The First Line of Defense
The dust cup is the primary collection point for dirt and debris. Emptying it regularly is crucial for maintaining suction power. Ideally, you should empty the dust cup after each use or at least after every few cleaning sessions. To empty the dust cup, detach it from the vacuum, hold it over a trash can, and press the release button to empty the contents.
For added hygiene, consider emptying the dust cup outdoors to prevent dust from recirculating in your home. Some models have a bottom release while others have a top release. Consult your manual if you have any questions.
2. Cleaning the Filters: Breathing New Life into Your Vacuum
Filters play a vital role in trapping dust and allergens, preventing them from escaping back into the air. Shark Lift-Away vacuums typically have multiple filters, including a pre-motor filter and a post-motor filter.
- Pre-Motor Filter: This filter is usually located near the dust cup and protects the motor from dust and debris. Remove the filter and gently tap it to remove loose dirt. If it’s washable, rinse it with lukewarm water and let it air dry completely before reinstalling. Never put a wet filter back into the vacuum, as this can damage the motor.
- Post-Motor Filter: This filter is typically located at the back of the vacuum and captures fine dust particles. Remove the filter and follow the same cleaning procedure as the pre-motor filter. Some models have HEPA filters, which are particularly effective at trapping allergens.
3. Taming the Brush Roll: Untangling and Removing Debris
The brush roll is responsible for agitating and lifting dirt and debris from carpets and floors. Over time, it can become tangled with hair, threads, and other debris, reducing its effectiveness.
- Removing the Brush Roll: Most Shark Lift-Away models have a release mechanism that allows you to easily remove the brush roll. Consult your user manual for specific instructions.
- Cleaning the Brush Roll: Use scissors or a seam ripper to carefully cut away any tangled hair or threads. Remove any remaining debris with your fingers or a soft brush. If the brush roll is heavily soiled, you can wash it with mild soap and water, ensuring it’s completely dry before reinstalling.
- Checking for Blockages: While the brush roll is removed, inspect the brush roll housing for any blockages and remove them.
4. Inspecting and Cleaning the Hoses and Wands: Ensuring Uninterrupted Airflow
Hoses and wands can also become clogged with debris, restricting airflow and reducing suction power.
- Detaching the Hoses and Wands: Disconnect the hoses and wands from the vacuum and inspect them for any blockages.
- Clearing Blockages: Use a long, flexible object, such as a broom handle or a flexible cleaning brush, to remove any blockages. You can also use a vacuum hose to suck out any loose debris.
- Washing the Hoses and Wands: If the hoses and wands are heavily soiled, you can wash them with mild soap and water, ensuring they’re completely dry before reinstalling.
5. Wiping Down the Exterior: Maintaining a Pristine Appearance
Finally, wipe down the exterior of your Shark Lift-Away vacuum with a damp cloth to remove any dust or dirt. Pay attention to the wheels and other moving parts, ensuring they’re clean and free of debris.
People Also Ask (FAQs)
How often should I clean my Shark Lift-Away vacuum?
Empty the dust cup after each use or at least after every few uses.
Clean the filters every 1-3 months, depending on usage.
Clean the brush roll and hoses as needed, typically every few months.
Can I wash all the filters in my Shark Lift-Away vacuum?
Check your user manual to determine which filters are washable. Typically, pre-motor and post-motor filters are washable, but HEPA filters may require specific cleaning instructions.
How do I prevent my Shark Lift-Away vacuum from smelling bad?
Regularly empty the dust cup and clean the filters.
Avoid vacuuming wet debris.
Use a vacuum deodorizer or place a cotton ball soaked in essential oil in the dust cup.
My Shark Lift-Away vacuum has lost suction power. What should I do?
Check the dust cup and filters for clogs.
Inspect the brush roll and hoses for blockages.
Ensure the vacuum is properly assembled.
How do I clean pet hair from my Shark Lift-Away vacuum?
Use scissors or a seam ripper to remove tangled hair from the brush roll.
Consider using a pet hair removal tool to pre-clean carpets and upholstery.
Empty the dust cup more frequently when vacuuming pet hair.
Conclusion: A Clean Vacuum for a Cleaner Home
Maintaining a clean Shark Lift-Away vacuum is essential for optimal performance, longevity, and a healthy home environment. By following the steps outlined in this guide, you can ensure your vacuum operates at peak efficiency, effectively removing dust, debris, and allergens from your home. Regular cleaning not only preserves the functionality of your vacuum but also contributes to a cleaner and healthier living space.
Remember, your Shark Lift-Away is an investment in your home’s cleanliness, and a little maintenance goes a long way in ensuring it continues to serve you well for years to come. By consistently and thoroughly cleaning your machine, you’ll maximize its lifespan and continue to achieve a superior level of clean.