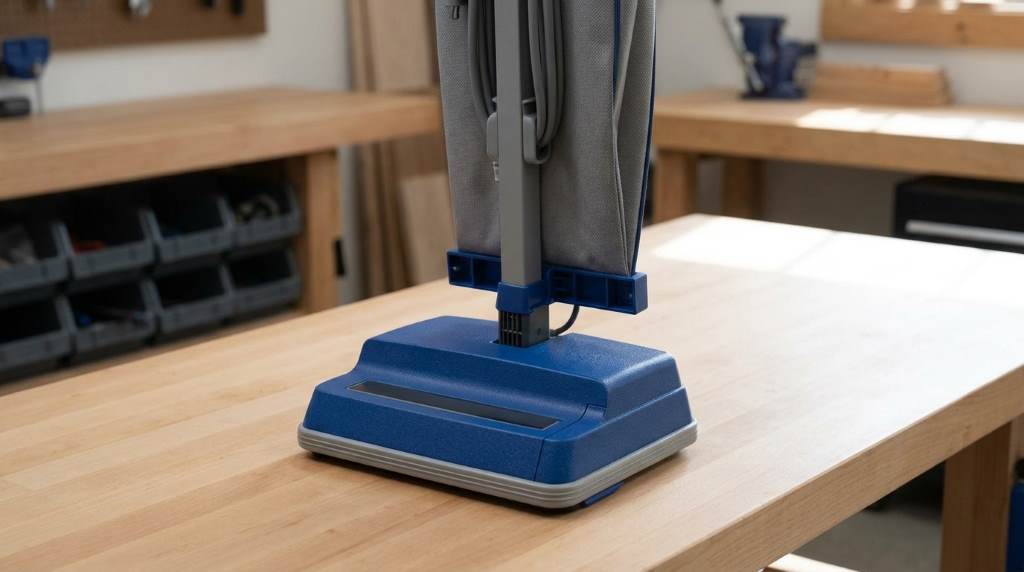
To replace the belt on an Oreck Commercial XL, unplug the vacuum, remove the bottom plate, install a new belt around the motor shaft and brush roller, then reassemble the base. Following the correct steps helps restore proper brush rotation, improves cleaning performance, and prevents unnecessary wear on internal parts.
Regular vacuum maintenance improves cleaning efficiency and extends equipment life. According to industry estimates, replacing worn vacuum belts can restore optimal brush performance while reducing strain on the motor. If you own an Oreck Commercial XL Vacuum, learning this simple maintenance task saves time and keeps your vacuum working effectively for everyday cleaning.
Why the Belt Matters
The vacuum belt transfers motor power directly to the brush roller. As a result, carpet fibers receive deeper agitation that lifts embedded dirt more effectively.
However, every rubber belt stretches with normal use over time. Eventually, reduced tension causes weaker brush movement and lower cleaning performance.
Signs Your Oreck Commercial XL Belt Needs Replacement
Several warning signs appear before a belt completely fails. Recognizing these symptoms early helps prevent unnecessary motor strain.
- The brush roller stops spinning.
- The vacuum leaves dirt behind.
- A burning rubber smell appears.
- The belt looks cracked or stretched.
- Cleaning performance suddenly decreases.
- The vacuum produces unusual noises.
Tools and Materials You Need
Fortunately, replacing the belt requires only a few basic items. Preparing everything first makes the process faster and safer.
- Replacement Oreck Commercial XL belt
- Phillips screwdriver
- Clean microfiber cloth
- Small brush for debris removal
- Protective work gloves
Safety Steps Before Starting
Always disconnect the vacuum from the electrical outlet before opening any components. This simple precaution prevents accidental motor activation during maintenance.
Next, place the vacuum on a clean, flat surface with enough working space. Good lighting also helps you inspect every component carefully.
How to Replace the Belt on Oreck Commercial XL
Step 1: Unplug the Vacuum
Disconnect the power cord completely before beginning the repair. Never perform maintenance while the vacuum remains connected to electricity.
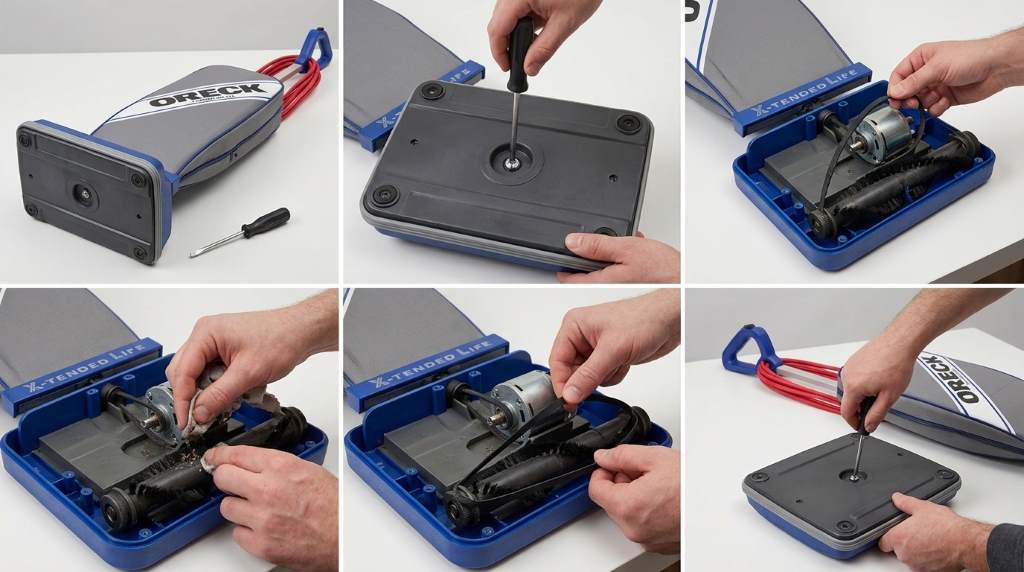
Step 2: Lay the Vacuum Flat
Carefully turn the vacuum upside down to expose the bottom plate. This position provides easy access to the brush roller assembly.
Step 3: Remove the Bottom Plate
Use the screwdriver to loosen the retaining screws carefully. Then lift the bottom plate away and place it somewhere safe.
Step 4: Remove the Brush Roller
Lift the brush roller gently from both sides of the housing. The worn belt should slide off without significant resistance.
Step 5: Remove the Old Belt
Pull the damaged belt away from the motor shaft completely. Afterward, inspect the area for dust, debris, or wrapped hair.
Step 6: Clean the Brush Area
Remove accumulated debris using a small cleaning brush and microfiber cloth. Consequently, the new belt operates with less resistance.
Step 7: Install the New Belt
Slide the replacement belt onto the motor shaft first. Then stretch the opposite end around the brush roller pulley securely.
Step 8: Reinstall the Brush Roller
Position the brush roller back into its original slots carefully. Make sure the belt stays centered without twisting.
Step 9: Rotate the Brush by Hand
Turn the brush roller manually several complete rotations. This quick test confirms proper belt alignment before reassembly.
Step 10: Reattach the Bottom Plate
Replace the bottom plate and tighten each screw evenly. Avoid overtightening because excessive force may damage the housing.
Step 11: Test the Vacuum
Reconnect the power cord and switch the vacuum on briefly. The brush should spin smoothly without unusual sounds or vibration.
Common Mistakes to Avoid
Small installation mistakes often reduce belt life considerably. Therefore, checking your work carefully prevents repeated repairs.
- Installing the belt backward
- Twisting the belt during installation
- Skipping debris removal
- Using the wrong replacement belt
- Forgetting to inspect the brush roller
- Overtightening the bottom screws
How Often Should You Replace the Belt?
Replacement frequency depends on cleaning habits and floor conditions. Homes with pets generally require more frequent belt inspections.
Many users inspect the belt every six months during routine maintenance. Nevertheless, replace it immediately whenever visible wear appears.
Tips to Make the New Belt Last Longer
Proper maintenance extends belt life while improving cleaning consistency. Simple habits also reduce unnecessary motor stress.
- Remove tangled hair regularly.
- Clean the brush roller monthly.
- Avoid vacuuming large hard objects.
- Store the vacuum in a dry location.
- Inspect the belt during routine cleaning.
- Replace damaged brush rollers promptly.
When the Vacuum Still Does Not Work Properly
If the brush still refuses to spin, inspect the roller bearings carefully. Damaged bearings create excessive resistance despite a new belt.
Likewise, examine the motor shaft for damage or excessive wear. Internal motor problems require professional inspection or replacement parts.
Should You Replace the Belt Yourself?
Most homeowners can complete this repair within twenty minutes using simple tools. Additionally, replacing the belt yourself usually costs much less than professional service.
However, seek qualified repair assistance if the vacuum has electrical damage. Safety always remains more important than saving repair costs.
Conclusion
Replacing the belt on an Oreck Commercial XL remains one of the easiest maintenance tasks. Following the proper steps restores brush performance and improves everyday cleaning results.
Inspect your vacuum regularly and replace worn belts before they fail completely. Consistent maintenance keeps your vacuum operating efficiently while helping protect your investment for years.
Frequently Asked Questions
How do I know my Oreck Commercial XL belt is worn out?
A weak brush roller, burning smell, or visible cracks usually indicate the belt needs replacement.
Can I replace the belt without professional help?
Yes, most users can replace the belt safely using basic tools and careful instructions.
How long does replacing the belt take?
The entire process usually takes about fifteen to twenty minutes.
Should I replace the brush roller with the belt?
Replace the brush roller only if it shows excessive wear or physical damage.
Can a stretched belt damage the vacuum?
Yes, a stretched belt reduces cleaning performance and may place extra strain on the motor.