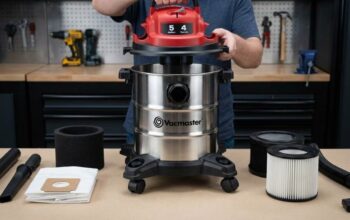
To empty a Craftsman Heavy Duty Shop Vac, switch the vacuum off, unplug it, remove the lid, and safely dispose of the collected debris. Clean the drum and filter before reassembling everything to keep strong suction and reliable performance.
Keeping a shop vacuum clean improves airflow and extends motor life. According to industry maintenance recommendations, clogged filters can significantly reduce suction performance, while regular cleaning helps maintain consistent efficiency. This guide explains every step clearly, and if you want to learn more about the Craftsman Heavy Duty Shop Vac, you can explore additional details through that resource. Every instruction below focuses on safe, practical maintenance for everyday users.
Why Emptying Your Shop Vac Matters
A full collection drum reduces airflow and makes the vacuum work harder. Regular emptying keeps suction strong and improves overall cleaning performance.
Clean equipment also reduces unpleasant odors and dust circulation. As a result, your workspace stays cleaner and healthier after every project.

Items You Need Before Starting
- Work gloves
- Dust mask for fine debris
- Trash bag or waste container
- Soft cleaning brush
- Dry microfiber cloth
- Mild soap and water if needed
Prepare the Shop Vac Safely
Always switch the vacuum off before beginning any maintenance. Then unplug the power cord from the electrical outlet completely.
Move the vacuum onto a flat surface before opening it. This position helps prevent accidental spills during the cleaning process.
How to Empty a Craftsman Heavy Duty Shop Vac
Step 1: Remove the Power Head
Release the side latches carefully with both hands. Next, lift the motor head straight upward without tilting it.
Step 2: Set the Lid Aside
Place the motor assembly on a clean and stable surface. Keep the filter away from dirt whenever possible.
Step 3: Empty the Collection Drum
Carry the drum to an approved waste disposal location carefully. Slowly pour the debris into a trash bag or container.
Shake the drum gently until loose material falls out completely. However, avoid striking the container against hard surfaces.
Step 4: Inspect the Interior
Look inside the drum for packed dirt or sharp objects. Remove leftover material carefully with gloved hands or a brush.
Step 5: Clean the Drum
Wipe the inside using a dry cloth after emptying the debris. Wash the drum with mild soap if sticky residue remains.
Allow every surface to dry completely before putting the vacuum together. Moisture inside the drum can affect future vacuuming performance.
Check and Clean the Filter
A dirty filter blocks airflow and reduces suction power noticeably. Therefore, inspect the filter during every emptying session.
Tap the filter gently over a trash container to remove dust. Brush away remaining debris without damaging the filter material.
Replace damaged filters immediately for the best cleaning results. Worn filters cannot protect the motor effectively.
Cleaning After Wet Pickup
Liquid collection requires additional cleaning after every use. Empty the tank immediately to prevent mold and unpleasant odors.
Wash the drum thoroughly with clean water and mild detergent. Afterwards, dry every component before storing the vacuum.
Reassemble the Vacuum Correctly
Place the filter back into its proper position securely. Then align the motor head with the collection drum carefully.
Fasten both side latches until they lock firmly into place. Finally, reconnect the hose and accessories before the next use.
Common Mistakes to Avoid
- Emptying the vacuum while it remains plugged in
- Using damaged or clogged filters
- Ignoring wet debris after cleaning
- Overfilling the collection drum
- Storing the vacuum before drying completely
Signs Your Shop Vac Needs Emptying
- Noticeably weaker suction
- Dust escaping from the exhaust
- Full or nearly full collection drum
- Higher operating noise
- Reduced cleaning efficiency
Maintenance Tips for Longer Performance
Inspect hoses regularly for blockages and cracks during routine cleaning. Small problems become larger if ignored for long periods.
Store the vacuum indoors in a dry location after every use. Proper storage protects electrical parts and extends equipment life.
Clean accessories frequently because dirt builds inside attachments over time. Consistent maintenance keeps every cleaning session efficient.
When to Replace the Filter
Replace the filter whenever cleaning no longer restores strong airflow. Visible tears also indicate the filter needs immediate replacement.
Follow the manufacturer’s recommendations for compatible replacement filters. Proper parts help maintain safe and dependable vacuum operation.
Frequently Asked Questions
How often should I empty a Craftsman Heavy Duty Shop Vac?
Empty the drum whenever it becomes about two thirds full for the best suction.
Can I wash the collection drum?
Yes, wash it with mild soap and allow it to dry completely before reassembly.
Should I clean the filter every time?
Yes, checking and cleaning the filter during every emptying session improves performance.
Can I vacuum wet and dry debris together?
No, follow your model instructions because many filters require changing between wet and dry cleaning.
Why does suction remain weak after emptying?
A clogged hose, dirty filter, or damaged seal commonly causes reduced suction.
Conclusion
Learning how to empty a Craftsman Heavy Duty Shop Vac correctly protects the motor and maintains dependable suction. Following these simple maintenance steps also reduces unnecessary wear during everyday cleaning tasks.
Make vacuum maintenance part of your regular cleaning routine for better long term performance. Start using these steps today to keep your shop vacuum working efficiently for every project.