To empty an Amazon Basics stainless shop vacuum, switch the unit off, unplug it, remove the motor head, and dispose of the collected debris from the drum. Afterward, clean the filter if needed, reassemble the vacuum, and confirm every part locks securely before the next use.
Regular maintenance keeps a shop vacuum working efficiently and extends its lifespan. According to industry estimates, proper filter maintenance can help maintain strong suction, while routine cleaning reduces unnecessary motor strain. If you want to learn more about the Amazon Basics stainless steel shop vacuum, understanding its basic maintenance makes everyday cleaning much easier. This guide explains every step clearly, so beginners and experienced users can empty the vacuum safely and confidently.
Why You Should Empty Your Shop Vacuum Regularly
A full collection drum reduces airflow and affects cleaning performance. Therefore, emptying the container before it overfills keeps suction strong.
Frequent cleaning also prevents unpleasant odors and excessive dust buildup. As a result, your vacuum remains reliable for both wet and dry cleaning tasks.

Things to Do Before Emptying the Vacuum
Always turn the power switch off before touching any removable parts. Next, unplug the power cord from the electrical outlet completely.
Move the vacuum to a safe outdoor location whenever possible. Consequently, loose dust stays away from your indoor living space.
Recommended Safety Items
- Protective gloves
- Dust mask
- Trash bag
- Soft cleaning cloth
- Small brush
How to Empty Amazon Basics Stainless Shop Vacuum Step by Step
Step 1: Turn Off the Vacuum
Switch the vacuum off after finishing your cleaning task. Then disconnect the plug before opening the collection tank.
Step 2: Release the Side Latches
Locate the locking latches on both sides of the vacuum. Carefully release each latch without forcing the mechanism.
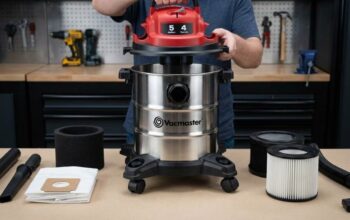
Step 3: Remove the Motor Head
Lift the motor housing straight upward using both hands. Place it carefully on a clean and dry surface.
Step 4: Empty the Collection Drum
Carry the stainless steel drum to your disposal area carefully. Slowly pour the collected debris into a suitable waste container.
Tap the drum gently if stubborn dirt remains inside. However, avoid striking the metal with excessive force.
Step 5: Inspect the Inside
Look inside the drum for stuck debris or moisture. Remove any remaining material with a soft cloth.
Step 6: Clean the Filter
Check the installed filter before putting everything back together. If it contains heavy dust, clean or replace it according to its condition.
Step 7: Reassemble the Vacuum
Position the motor head carefully over the collection drum. Finally, secure both side latches until they lock firmly.
How to Empty Wet Debris Safely
Liquid waste requires extra attention during disposal. Therefore, empty the drum immediately after completing wet cleaning jobs.
Rinse the collection drum with clean water after disposal. Then allow every component to dry before storing the vacuum.
How Often Should You Empty the Vacuum?
The correct schedule depends on the amount of collected debris. However, avoid filling the container beyond about two thirds of its capacity.
Fine dust usually fills the drum faster than larger debris. Consequently, inspect the collection level after every major cleaning project.
Common Mistakes to Avoid
- Opening the vacuum while it remains plugged in.
- Ignoring a clogged filter.
- Overfilling the collection drum.
- Reinstalling wet filters before drying.
- Forcing the locking latches closed.
Tips to Keep Your Shop Vacuum Working Better
Clean the filter regularly for consistent airflow and stronger suction. Additionally, inspect the hose for blockages after demanding cleaning jobs.
Store the vacuum in a cool and dry location after use. This habit protects the electrical parts from unnecessary moisture exposure.
Check all attachments before each cleaning session for visible damage. Likewise, replace worn accessories before performance declines noticeably.
Signs Your Vacuum Needs Maintenance
The vacuum may require attention when suction becomes noticeably weaker. Similarly, unusual sounds often indicate blocked airflow or worn components.
Dust escaping through the exhaust also deserves immediate inspection. Cleaning the filter usually solves this problem before it becomes serious.
Cleaning the Stainless Steel Drum
Wash the drum occasionally with mild soap and warm water. Afterward, dry every surface completely before reinstalling the motor assembly.
A clean stainless steel drum helps prevent lingering odors over time. Consequently, future maintenance becomes much easier and faster.
Storage Tips After Emptying
Wrap the power cord neatly around the storage hooks if available. Then place every attachment together to prevent accidental loss.
Keep the vacuum away from excessive humidity and direct sunlight. Proper storage protects both plastic and metal components for longer use.
Conclusion
Learning how to empty Amazon Basics stainless shop vacuum correctly protects both the vacuum and its long term performance. Following a simple routine keeps suction strong, reduces maintenance problems, and improves every cleaning session.
Make emptying and filter inspection part of your regular cleaning routine. That simple habit helps your shop vacuum stay dependable whenever you need it.
Frequently Asked Questions
How do I know when my shop vacuum is full?
Reduced suction and a nearly full collection drum indicate it is time to empty the vacuum.
Can I wash the stainless steel drum?
Yes, wash it with mild soap and water, then dry it completely before reassembly.
Should I clean the filter every time?
Inspect the filter after every use and clean it whenever noticeable dust builds up.
Can I vacuum liquids and dry debris together?
Follow the manufacturer recommendations and use the proper filter for each cleaning task.
Why is suction still weak after emptying?
A clogged filter or blocked hose usually causes weak suction even after emptying the drum.